Skidmore-Wilhelm has set the industry standard for testing bolt tension since the 1950s. Similarly to the way “Kleenex” became the generic term for tissues, “Skidmore” is commonly used as the industry wide term for bolt tension calibrators. Today, Skidmore-Wilhelm offers a full line of bolt tension measuring devices used for installations performed with manual, electric, pneumatic, and hydraulic wrenches.
Knowing the type (TC or hex), length, and diameter of the bolts you’ll be working with will determine which Skidmore model is right for your job and which accessories are required to complete a proper setup.
When is a Skidmore Used?
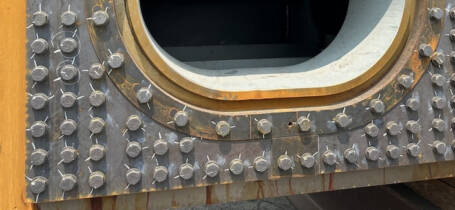
Skidmore bolt testing is required in steel buildings, bridges, and other high-strength structural projects for performing:
Engineers, inspectors, and ironworkers rely on Skidmore devices to verify that bolted connections meet precise tension requirements, helping prevent structural failures and maintain jobsite safety.
Choosing the Right Skidmore Model
Selecting the correct Skidmore model depends on the bolt diameter and length specified in your project requirements. The most common models available for purchase or rental include:
- Model MZ — for testing 1/2″ to 1-1/4″ bolt diameters
- Model HS — for testing 1″ to 1-1/2″ bolt diameters
- Model K — for testing 1-1/4″ to 2-1/2″ bolt diameters
Each model uses specific bushings, plates, adapters, and spacers to match the bolt length, diameter, and type.
Skidmore Setup: What You’ll Need & How to Install It
Before setting up the unit, identify:
- Whether you’re testing TC bolts or hex bolts
- If those bolts are regular or short length (commonly used with DTIs)
- The diameter and length of every bolt you’ll be testing
- A safe, stable location to mount the device
Follow the steps below to correctly configure your Skidmore.
1. Mount the Skidmore
- Select a stable, rigid surface such as an I-beam, flange column, or skid capable of supporting the unit’s weight and applied load.
- Ensure the mounting location allows safe wrench access and clear visibility of the gauge.
- Tighten the wing screws until snug. Do not overtighten.
2. Select the Correct Bushing
Each bolt diameter and bolt length requires the appropriate TC or hex style bushing.
Choose from:
- Regular bushings
- Short bushings
- Spacer bushings – available for long hex bolts
How to install:
- Insert the bushing into the rear of the calibrator until fully seated.
- Secure it using the supplied C-clip.
This ensures proper alignment between the bolt shank and the Skidmore’s loading cell.
3. Install the Proper Plate
Plates must match both the bolt diameter and bolt length.
Choose from:
- Regular plates
- Short plates for short bolts or Direct Tension Indicator (DTI) testing
How to install:
- Place the plate onto the front of the Skidmore.
- Secure it using supplied hex screws.
Correct installation ensures the nut tightens against the plate surface to accurately measure bolt tension.
4. Install the Reaction Bar
The reaction bar provides a point of contact and resistance for rotation and torque-based installations. Tools with their own reaction members rely on an additional reaction point to operate safely and effectively, both for tightening and loosening fasteners.
How to install:
- Position the reaction bar against the plate on the designated area.
- Secure it using the larger mounting bolts supplied with the unit.
- Keep hands away from pinch points during operation.
Note: Longer hex bolts may require spacer bushings to pull the bolt back, allowing the nut to sit flush so the tool can properly react against the reaction bar.
5. Insert the Bolt
With the Skidmore mounted and accessories installed, insert the bolt into the calibrator.
How to insert the bolt:
- Insert the threaded end of the bolt through the back.
- Ensure the bolt passes through the plate and the head is fully seated in the bushing.
- If using a DTI (Direct Tension Indicator), install bumps out before placing the washer and nut.
- Install the washer and nut as required for the bolt type being tested.
6. Add Spacers if Needed
Spacers are used to achieve the correct bolt stick-out. If the bolt sits too deep, add spacers behind the washer and nut.
Rule of thumb:
- Ideally, the nut should be flush with the end of the bolt, but
- The bolt should extend no more than three threads past the nut.
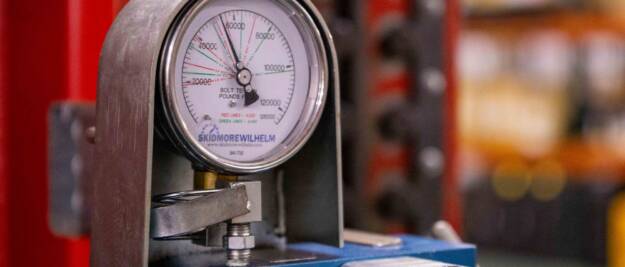
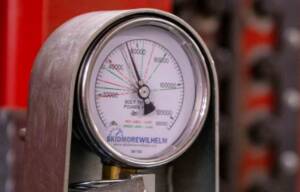
How to Read the Gauge
The Skidmore calibrator gauge measures bolt tension in pounds force (lbf). Gauges with metric force units are also available.
Many engineering and structural specifications reference bolt tension in kips:
1 kip = 1,000 lbf
Gauge Dial Scale Resolution
- The gauge starts at 4 kips (4,000 lbf)
- Large dial markings: 10,000 lbf increments
- Small dial markings: 2,000 lbf increments
Accurate interpretation ensures the applied tension meets project specifications.
Red and Green Reference Lines
Some gauges include red and green reference lines.
- These indicate the minimum installed bolt tension for common ASTM A325 and A490 structural bolts and are for reference purposes only.
Always consult the Structural Bolting Handbook or your project specifications to determine required bolt tension.
Common Mistakes to Avoid
Even with the correct model and accessories, improper setup can lead to inaccurate readings or unsafe testing conditions.
1. Using the Wrong Bushing or Plate Size
- Always match accessories to the exact bolt diameter and length.
- Mixing sizes can cause misalignment and false readings.
2. Skipping Reaction Bar Installation
- Rotation and torque-based tools require a reaction member to properly function.
- Without it, TN tools, torque wrenches, and nut busters cannot operate correctly and may damage the Skidmore.
3. Incorrect Bolt Stick-Out
- The nut should be flush with the end of the bolt but should not exceed past three threads.
- Use spacers as needed to achieve proper stick-out before applying load.
4. Failing to Secure the Skidmore
- Always mount to a rigid surface.
- Movement during testing compromises accuracy and safety.
5. Not Verifying Alignment
- Ensure the bolt is fully seated in the bushing.
- Confirm all accessories are secure and properly installed.
6. Rushing Between Bolt Sizes
- Changing bolt diameters requires swapping multiple components.
- Treat each bolt size as a new setup.
Skidmore Calibration Services
To ensure your Skidmore-Wilhelm bolt tension calibrator provides accurate and reliable readings, we offer fast, in-house calibration services performed by our expert technicians. Our high-capacity system is designed to handle the full range of Skidmore models, ensuring each unit meets manufacturer specifications.
Every Skidmore calibrator is carefully inspected, tested, and calibrated to guarantee precise performance for your bolt tension verification needs. Annual calibration ensures your Skidmore bolt tension calibrator provides accurate and reliable readings.
Benefits of Our Skidmore Calibration Services
- Accurate Results: Repeated accuracy within specified tolerances for consistent performance.
- Quick Turnaround: Calibrated units are returned promptly to minimize downtime.
- Documentation: Certificates provided for assurance and adherence to project requirements.
Note: Regular calibration ensures accuracy, safety, and compliance on every job and helps maintain the longevity of your Skidmore by identifying potential wear or component issues.
Who Manufactures Bolt Tension Calibrators?
The two primary manufacturers of bolt tension testing devices, Skidmore-Wilhelm and Norwolf Tool Works. Both offer dependable, cost-competitive products with similar capabilities. The final choice typically comes down to user preference and project requirements.
Final Thoughts
Skidmore-Wilhelm calibrators remain the benchmark for bolt tension verification across structural steel and heavy construction industries. With the correct model and setup, users can confidently perform PIV, RoCap, and general bolt testing to meet project specifications and maintain safe, reliable bolted connections.